A blog site with Jekyll, Github Pages Eclipse Che and Codenvy
TweetHello everyone! I’m starting my new blog site. This blog site is hosted by Github Pages and uses Jekyll as the blog engine. For this first blog post, let’s see how to create such a blog post: I’m going to detail all the steps to create a blog site with Jekyll, Github Pages, Docker, Eclipse Che cloud IDE, and Codenvy.
You can immediately help me improve this blog site by clicking on this link 
For the next blog post, I will explain how to create this kind of link for your Github project.
1. Tools in Action: Jekyll, Github Pages, Che, Codenvy, Docker
Websites Hosted by Github: Github Pages
Github offers free website hosting. This is called Github Pages. Hosting a website with Github Pages has some advantages:
- It’s free.
- It’s maintained by Github. We won’t need to deal with upgrades of your server, downtimes, etc.
- It’s versioned with Git. Track all your changes.
- We don’t depend on Github. If Github stops the Pages service, it won’t be a problem to host the site elsewhere.
With Github Pages, each site is actually a Github project. You can use it for your full static website or use the available Jekyll blog site generator.
What is Jekyll?
Github Pages comes with Jekyll. Jekyll is “a simple, blog-aware, static site generator.”
It takes markdown files and template files as input and merges them to generate a static site.
Thus, there is no database to deal with, no security issue, no performance issue.
For our blog site, we are going to create our site on a new Github project. A Jekyll project is composed of several folders prefixed by _:
_includescontains headers, footers, menus, sidebars to be included in your pages_layoutscontains the template files_postscontains your blog posts files_sasscontains scripted CSS using Sass
All these folders are templates or Sass CSS that will be used to generate the static site. If you have any folders not starting with _, these ones won’t change and stay static.
For Github Pages sites, Github will regenerate the site with Jekyll each time a modification is done in your Github git project.
Docker
Docker is a container technology. As opposed to virtualization (Virtual box or VMWare), containers are lightweight:
containers use isolated and native host processes. When a Docker image is running, all the processes are actually running on the host machine.
Thus, Docker can run only machines based on the operating system kernel. For instance, you can run any Linux distribution on a Docker hosted by Linux.
Docker offers a way to write and build images based on recipes with inheritance capabilities. You write how to build an image providing Linux command to run.
Typically, we will run commands using apt-get install or wget http://archive.zip && unzip archive.zip to build our images.
Docker is a nice tool for developers as it describes a reproducible way to build an image. You can share the recipe of your Docker image and use Git to
keep all the change history of this file. Anyone can then rebuild your image. It’s like you have the source code of your virtual machine.
Eclipse Che Hosted by Codenvy
When writing our blog post, we may not want to publish the site to ‘production’ each time you make a change just to see how it looks like. To test the site before publishing it, we could install Jekyll locally on our computer and run the site generation locally for testing. However, installing Jekyll is not that easy. Ruby, NodeJS, and gem are required, and the installation steps may differ from one system to another. Plus, we want to have our editing environment available from anywhere. We are going to use an Eclipse Che hosted by Codenvy. Eclipse Che is a Cloud IDE, and we will use it to edit our blog site, test it, and push the changes to Github. Codenvy provides a Docker infrastructure on the cloud to run your applications. You don’t have to install anything: everything will be available from a browser. We will be able to create our Docker recipe, generate and run our Jekyll site … from anywhere, with any device.
2. Choose a Theme
Let’s start creating our blog site. First of all, we won’t start from scratch but reuse an existing Jekyll theme to bootstrap our site. On the site http://jekyllthemes.org/, we can find many themes for Jekyll. The site samples are complete and ready to use. As far as I’m concerned, I’ve chosen this one: Freshman21.
3. Fork Jekyll Theme in your Github
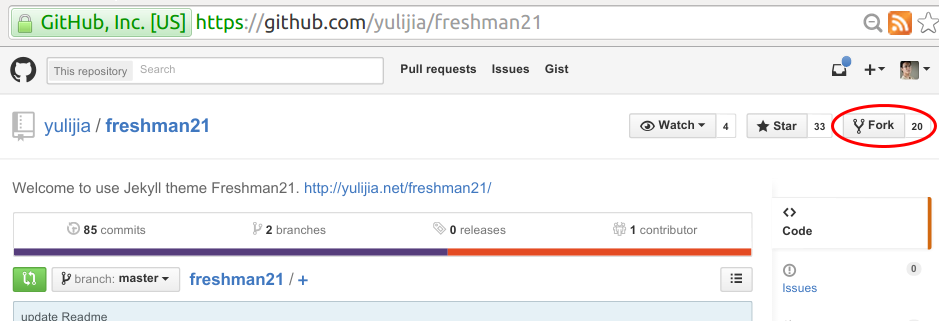
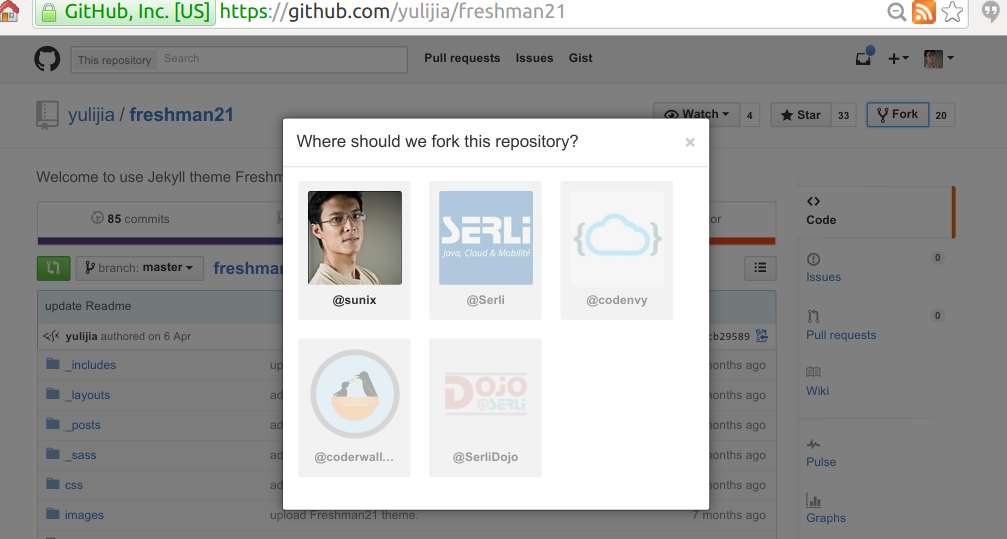
Once logged into Github.com, we will fork the Freshman21 project.
You can fork it from https://github.com/yulijia/freshman21.
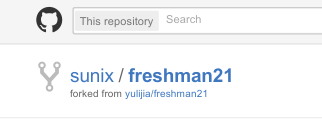
You can try the result of the forked theme right away http://yourgithubname.github.io/freshman21.
Main Website
With Github Pages, a site can be served directly from http://yourgithubname.github.io or http://yourgithubname.github.io/asitename.
If this is going to be your main site, rename it yourgithubname.github.com. The site will be available in http://yourgithubname.github.io/.
If not, Github will use the branch gh-pages that will be used by Github Pages.
The site will be available at http://yourgithubname.github.io/githubProjectName/.
Freshman21 themes already include both branches. In this project, they represent 2 different versions of the site (with and without javascript).
In our case, we are going to start from the gh-pages branch version.
4. Import in Codenvy Eclipse Che
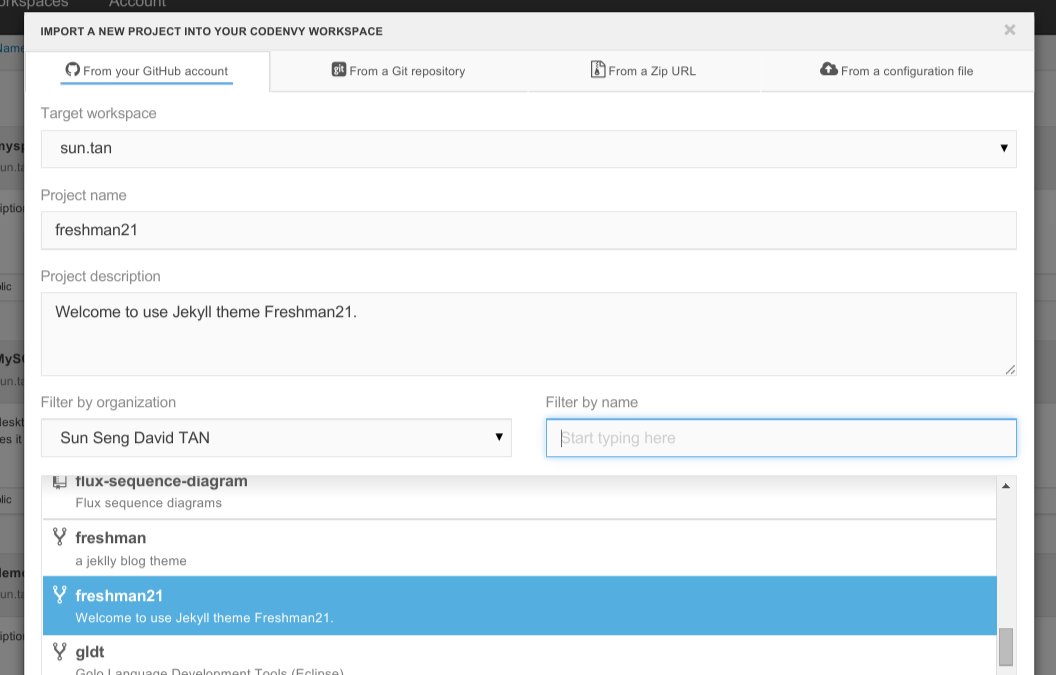
In Codenvy website, log in with your Github account and import the forked project.
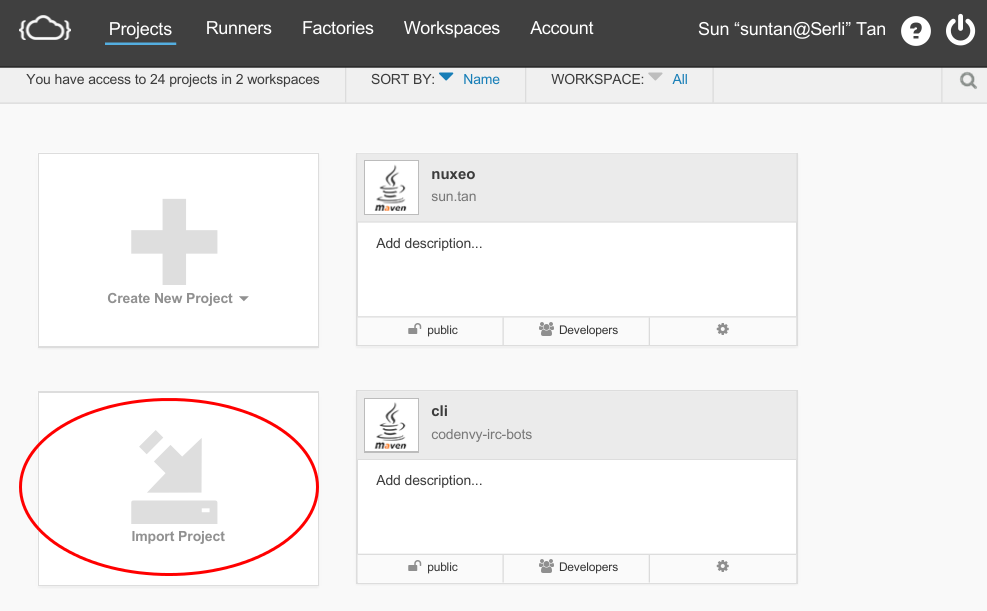
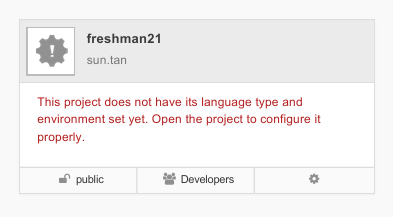
Open (double click) the project.
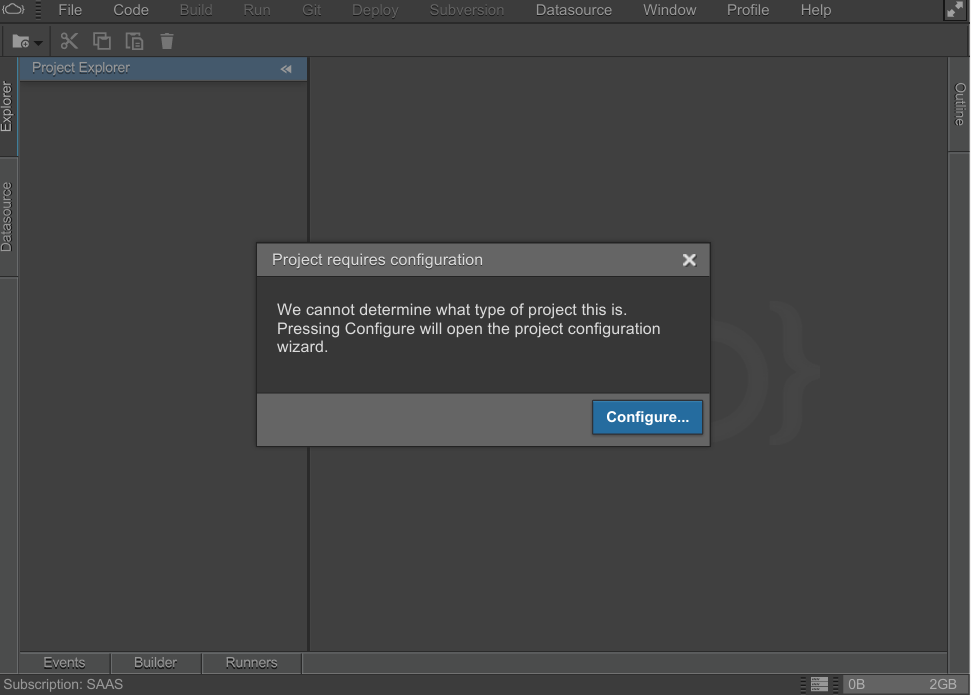
Normally Eclipse Che should ask to configure your project. Configure the project by choosing blank as project type.
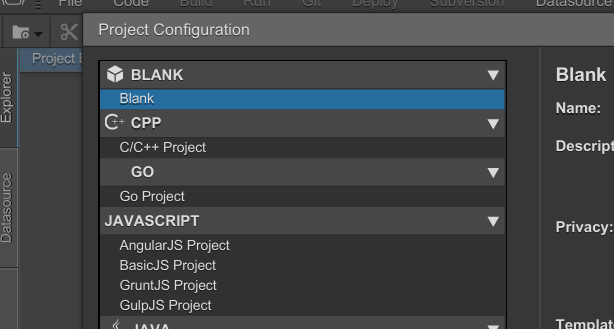
At that point, we should have the IDE opened with the freshman21 project.
gh-pages branch
if the site is going to be your main Github Pages site, you can skip this part.
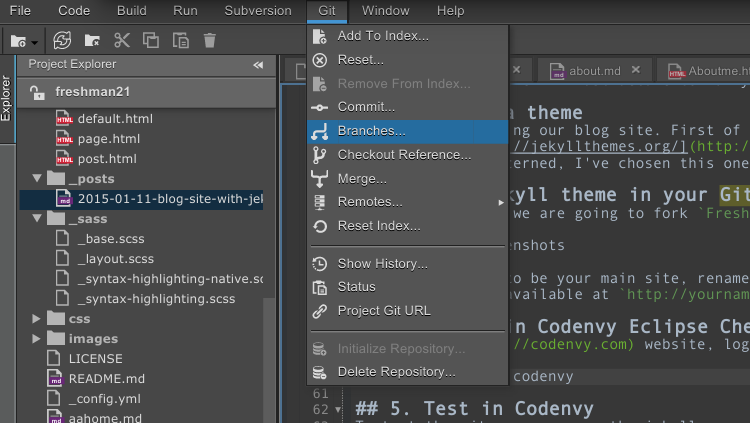
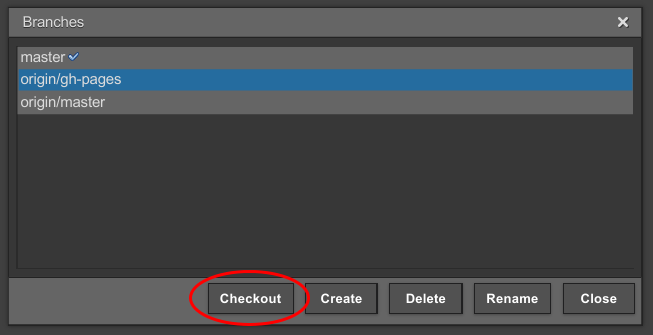
Otherwise, from the Git > Branches ... menu action, checkout the branch gh-pages.
5. Test in Codenvy
To test the site before pushing it, we can run the jekyll generator with a custom Docker runner.
Create a new Custom Runner in Runners - Configs tab, create a new configuration.
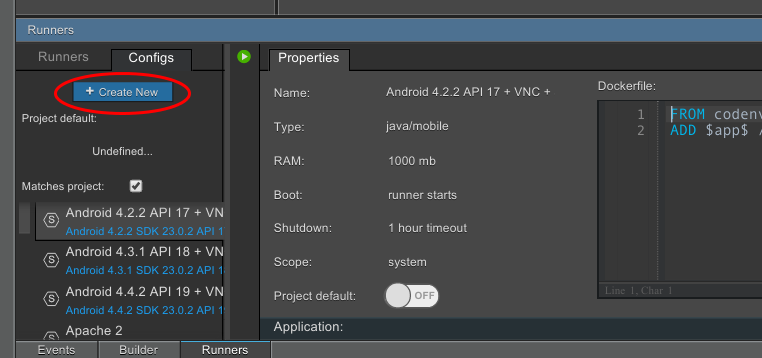
Rename it Jekyll.

Paste this content:
FROM sunix/jekyll4che

ENV CODENVY_APP_BIND_DIR /home/user/app
VOLUME ["/home/user/app"]

USER root
WORKDIR /home/user/app

CMD echo 'url: "http://'$CODENVY_HOSTNAME':'$CODENVY_PORT_4000'"' >> _config.yml && \
    echo 'baseurl: ""' >> _config.yml && \
    jekyll serve
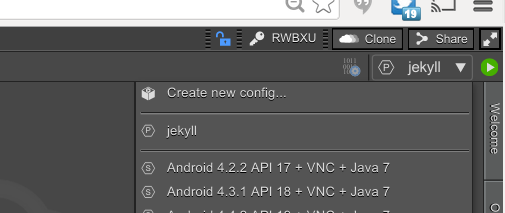
Save and start the runner. Once started, the running site link should be available.

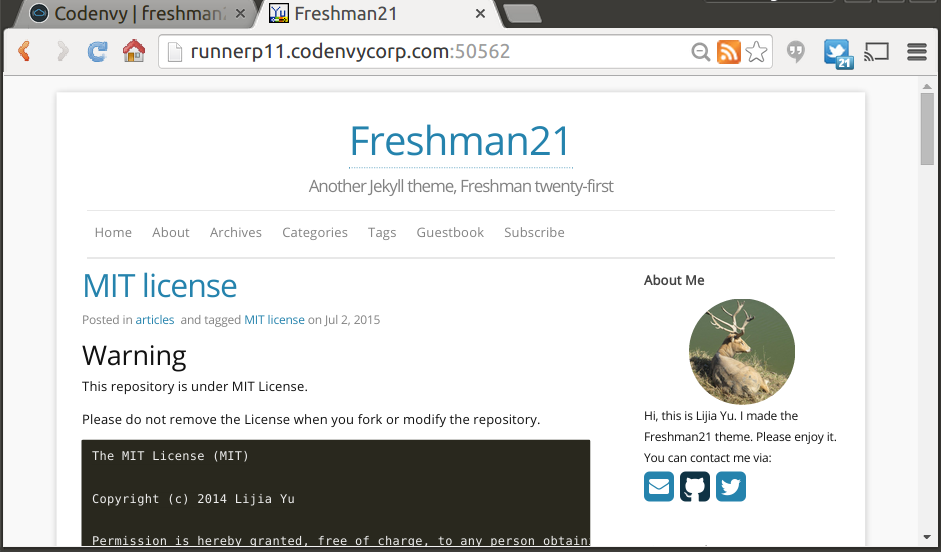
Use Dockerhub prebuilt images to speed up
We use sunix/jekyll4che image that’s been built by Dockerhub. If not cached, instead of executing all the steps to install the application, it will download a prebuilt image and speed up the startup of our application.
sunix/jekyll4che looks like:
FROM codenvy/shellinabox
RUN sudo apt-get update && \
    sudo apt-get upgrade -y && \
    sudo apt-get install -y ruby ruby-dev patch nodejs python locales && \
    sudo gem install github-pages
RUN sudo dpkg-reconfigure locales && \
  sudo locale-gen C.UTF-8 && \
  sudo /usr/sbin/update-locale LANG=C.UTF-8
ENV LC_ALL C.UTF-8
ENV LANG en_US.UTF-8
ENV LANGUAGE en_US.UTF-8
EXPOSE 4000
ENV CODENVY_APP_PORT_4000_HTTP 4000
Mounting volume instead of copying sources
Right away, you can try the generated site by clicking on the link just below the runner panel. We didn’t use the ADD command
ADD $app_src$ /home/user/app/But the VOLUME Docker command to mount sources. This way, modifications are live updated on runners. FYI, changes done on _config.yml won’t get
reloaded. You will need to restart the Docker runner.
Overriding URL configuration at runtime
The last lines of the Dockerfile override the base URL and the URL so that the site works well when running on Eclipse Che Docker AND on Github Pages.
6. Customization
Create a New Blog Post
First, remove all the blog posts files that are coming with the theme in _posts folder.
To create a new blog post, create a new .md file in the _posts folder.
The file should start with headers:
---
layout: post
title: A blog site with Jekyll, Github pages Eclipse Che and Codenvy
modified: 2015-01-11
categories: [articles, Howto]
tags:
  - blog
  - jekyll
  - codenvy
  - eclipse che
  - github pages
comments: true
---
## Your first blog post !
hello world
Then you can write traditional text using the markdown syntax. You have written your first blog post!
I really recommend you to read this Jekyll documentation for your first blog post.
Site Configuration
_config.yml contains all the site configuration that you may want to customize. Here are the ones I have changed:
- title: The title (HTML) of the site. The title is also displayed on top of each page.
- tagline: A description of the site, will be displayed in h3 between the title and the menu
- author: Your name. Will be displayed in the ‘about me’ page
- email: Your email.
- description: It will appear in your document head meta and in your feed.xml site
- keywords: the keywords
- baseurl: the subpath of your site, e.g. /blog/. if this is not your main page, it should be the name of your Github project.
- url: should be http://yourusername.github.io
- twitter_username
- github_username
- disqus_shortname: subscribe to disqus, register your website and get comments on your site
- aboutme: about you
- aboutme_photo: URL to your photo
- google_analytics_key: put YOUR key here to enable tracking! (blank to disable)
7. Push to Github
Once we are happy with our site, we would like to push our changes to Github. First commit your changes:
- select the new and modified files and select the menu action:
Git > Add to index... - commit your changes
Git > Commit...
Push your changes to Github Git > Remotes... > Push...
You should normally have your changes pushed on your project and your website updated.
8. DNS Github Pages Setup
If you have your own DNS, create a new CNAME file and add your DNS name on it. As far as I’m concerned, I have a CNAME file with:
blog.sunix.org
And I have added a new CNAME entry in my DNS configure at Gandi:
Type: CNAME
TTL: 3 hours
Name: blog
Value: sunix.github.io.
Also, I’ve updated _config.yml URL and base URL:
baseurl: ""
url: "http://blog.sunix.org"
9. Comments with Disqus
By default, the Jekyll theme comes with integration for Disqus. You can create an account on Disqus and update the _config.yml accordingly.
Once logged into Disqus, you can add it to your site from the menu action Add Disqus To Site.

Fill in your site name and the short name (which will be used for the unique Disqus URL).
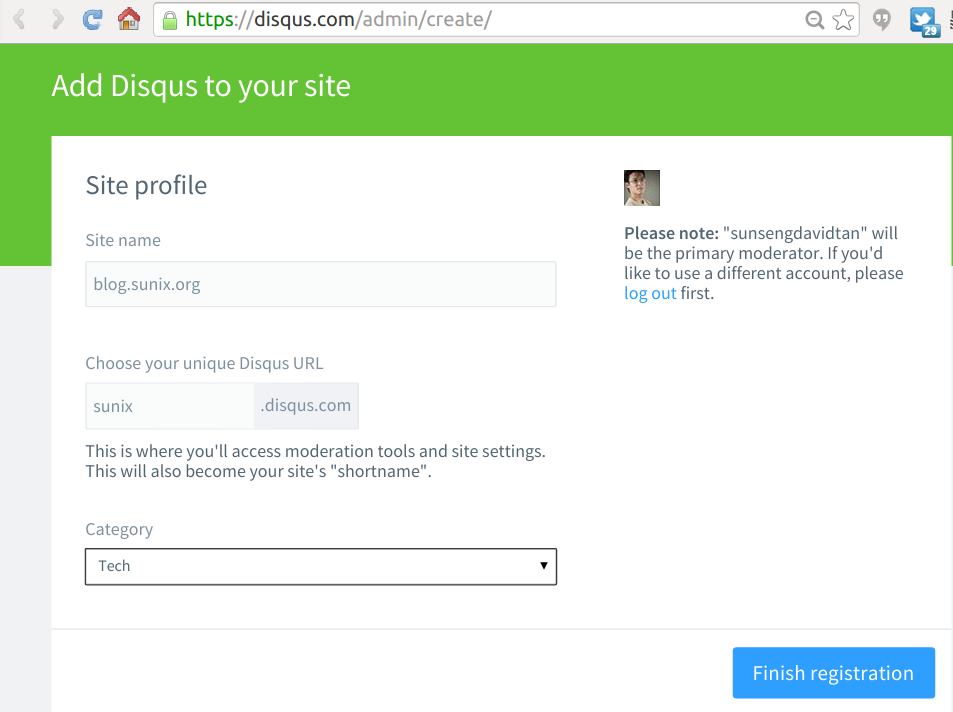
Finally, update your _config.yml file with your Disqus shortname:
disqus_shortname: sunix
From now on, people will be able to add comments to your blog posts.
Done!
That’s it! Don’t hesitate to leave any comments and improve this blog post, and 
Tweet